Creating your first virtual machine
Virtual Machines (VMs) are a way to run a computer inside your computer. Often with cloud computing these computers are running on a server somewhere far away in a data center. In this activity, you're going to install a VM on your own machine using free tools.
Learning Objectives
- Understand what a virtual machine is
- Be able to explain concepts of virtualization, including hypervisors, and host and guest operating systems
- Be able to install and interact with a virtual machine on your computer
Know your computer
Virtualization is awesome. To do it's thing, though, it requires very specific code that is written differently depending on the type of processor inside your c0mputer. You need to know some details about your computer to be able to install the right version of the hypervisor, and the right kind of virtual machine.
macOS
- If you're on an M-series Macbook, then you have Apple Silicon (arm64), proceed to step 3.
- If you don't know what type of processor you have, click the Apple logo in the top left of macOS and choose About this Mac. In the window, look at the "Chip" line. If it says Apple M-something, then you have Apple Silicon (arm64). Go to step 3. If it says Intel something, then you have Intel, and you should go to step 4.
- If you're on Apple Silicon, then you should either install Virtual Box for Apple Silicon, or use the instructions for UTM. In either case, you'll want to download the
arm64Ubuntu desktop iso. DON'T DOWNLOAD THEamd64ISO BECAUSE IT WON'T WORK. - If you're on an Intel Mac, then you should install Virtualbox for macOS/Intel hosts. You should install the
amd64Ubuntu desktop image. DON'T DOWNLOAD THEarm64IMAGE BECAUSE IT WON'T WORK.
Windows
- If you know what processor you have, go to the appropriate step (3 or 4) below.
- If you don't know what type of processor you have, open search on the computer and find "About your PC". Look at the Processor line there. If it says Intel or AMD something, then you've got that. If it says something else, you probably have the Snapdragon processor (I don't have one, so I don't know exactly what shows up there).
- If you're on a Snapdragon processor, then you should install Virtual Box with the instructions in the section below. You'll want to download the
arm64Ubuntu desktop iso. DON'T DOWNLOAD THEamd64ISO BECAUSE IT WON'T WORK. - If you're on an Intel or AMD processor, then you should install Virtualbox following the instructions in the section below. You should install the
amd64Ubuntu desktop image. DON'T DOWNLOAD THEarm64IMAGE BECAUSE IT WON'T WORK.
Installing the Hypervisor
A hypervisor is a program running on a computer that allows it to take the physical resources (e.g., storage and memory) of a host machine and divide them up between multiple guest operating systems. You can think of it like splitting one computer into a bunch of smaller computers. We're going to take your host operating system (likely either Windows or macOS) and install a guest Linux operating system in a virtual machine.
There will be two different paths for installing this VM - one for Windows and Intel Macs, and a separate one for Apple Silicon (M1/2/3) Macs. Make sure to follow the instructions appropriate to your computer. If you are unsure which version is right for you, ask.
Installing VirtualBox (Windows or Mac)
- Go to https://www.virtualbox.org/wiki/Downloads
- appropriate for your computer
- The Windows installer works for both Intel/AMD and ARM (Snapdragon) processors
- For macOS, there are two installers - select the appropriate one for your CPU architecture (Intel or Apple Silicon).
- Download Ubuntu Desktop from the Ubuntu website:
- Go to https://ubuntu.com/download/desktop and scroll down to the Ubuntu 25.04 section. Download the ISO appropriate for your CPU architecture (
arm64for Snapdragon or Apple Silicon)
- Go to https://ubuntu.com/download/desktop and scroll down to the Ubuntu 25.04 section. Download the ISO appropriate for your CPU architecture (
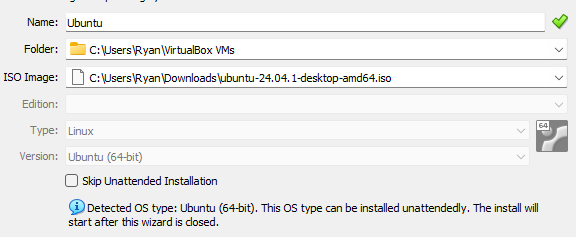
- Open VirtualBox and create a new virtual machine by clicking the New button

- Give it a useful name like "Ubuntu", then select the ISO image for Ubuntu Desktop that you downloaded. Uncheck the box to "Proceed with Unattended Installation."
- Expand the menu to "Specify virtual hardware." Give the VM 4096MB of Base Memory, and 2 Processors. (you can do less, but it will make things run slower)
- Expand the menu to "Specify virtual disk." Create a Virtual Hard Disk that is at least 15GB (preferably 20 if you have the space for it).
- Click Finish and the virtual machine installation will begin. Continue with "Installing Ubuntu" below
Installing UTM (Apple Silicon M1/2/3/4 Macs)
- You can choose to install UTM from the download at https://mac.getutm.app/ or by paying $9.99 on the Mac App Store. They are the same version; the App Store version just allows auto updates and allows you to support the UTM project.
- Go to https://ubuntu.com/download/desktop and scroll down to the Ubuntu 25.04 section. Download the ISO appropriate for your CPU architecture (
arm64for Apple Silicon) - Once the download is complete, follow the instructions on the UTM website (https://docs.getutm.app/guides/ubuntu/) to create a new virtual machine.
- Allocate at least 15GB of drive space (20 or more if you have the space for it), 4GB of RAM, and 2 CPU cores.
- If you see a blank screen after the VM reboots, you may need to open the VM settings and remove the ISO file as described in Step 9.
Installing Ubuntu
Ubuntu is a version of the GNU/Linux operating system. If you've never installed an operating system, this will be a fun new experience.
- In the menu that opens up once you start running, select "Try or install Ubuntu"
- Through the installation menu, you can use tab to navigate between options, space to toggle options, and Enter/Return to select. You are safe to select the default options for everything (and select a language that works for you).
- When asked how to connect to the internet, choose "Use a wired connection" - even if you're on WiFi, the virtual machine thinks it's connected with the wired connection.
- In Disk Setup, choose "Erase disk and install Ubuntu." You're only erasing the 20GB virtual disk you created, not your actual hard drive.
- When prompted, choose a username and password that you will remember.
- If asked at any point in the installation if you want Ubuntu Pro, you can select "Skip for now."
- Once you get through all the prompts, click the Green button in the bottom right to install the operating system on the computer. The installation will take a while, so be patient. If it takes more than 30 minutes, then something might be going wrong.
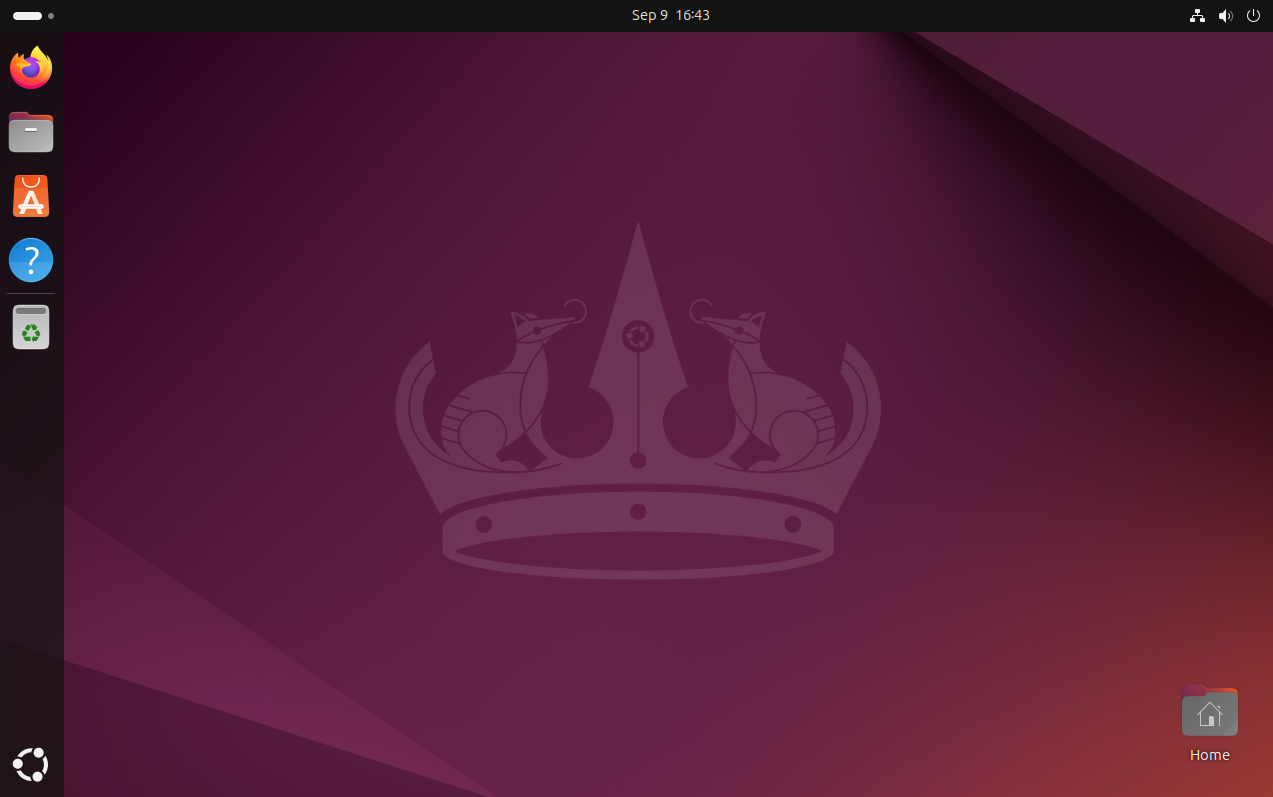
- Once the installation is finished, restart the virtual machine (you don't need to restart your host machine). You will be prompted to "Remove physical media and press enter" - VirtualBox automatically disconnects the virtual disk image, so just press enter.
Once you're through the installation and have installed Ubuntu Desktop, starting up your VM should present you with a login screen, then show you something like this:
Final setup
You can adjust the screen resolution by clicking the little line in the top left of Ubuntu desktop, searching for Settings -> Display -> and choosing the resolution you want. You may also want to adjust magnification to make things easier to read.
Once you've got it installed, you can explore a bit. See the Get to know Desktop Linux post for tips of what to look for, or Installing a web server to get started making a website on your VM.